 An email will
be sent stating that your kViewer account has been prepared. Set up your account from the link provided.
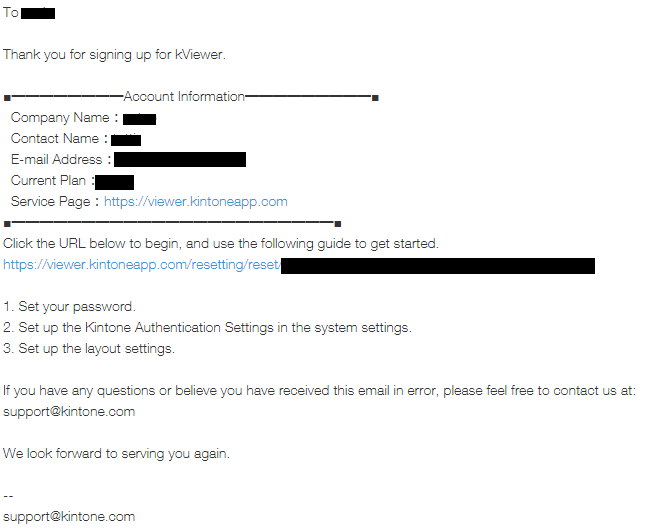
An email will
be sent stating that your kViewer account has been prepared. Set up your account from the link provided.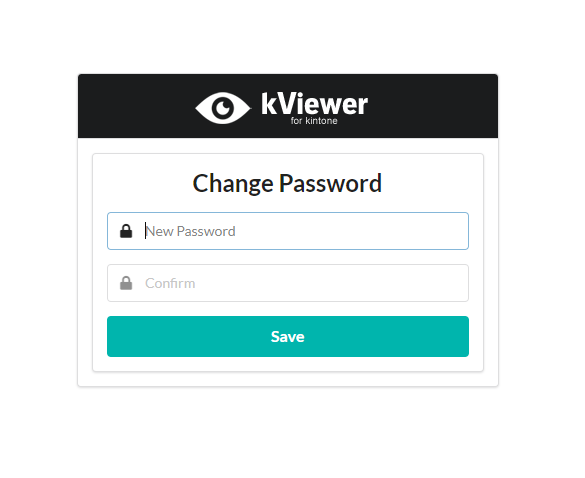 Set up a
password.
Set up a
password.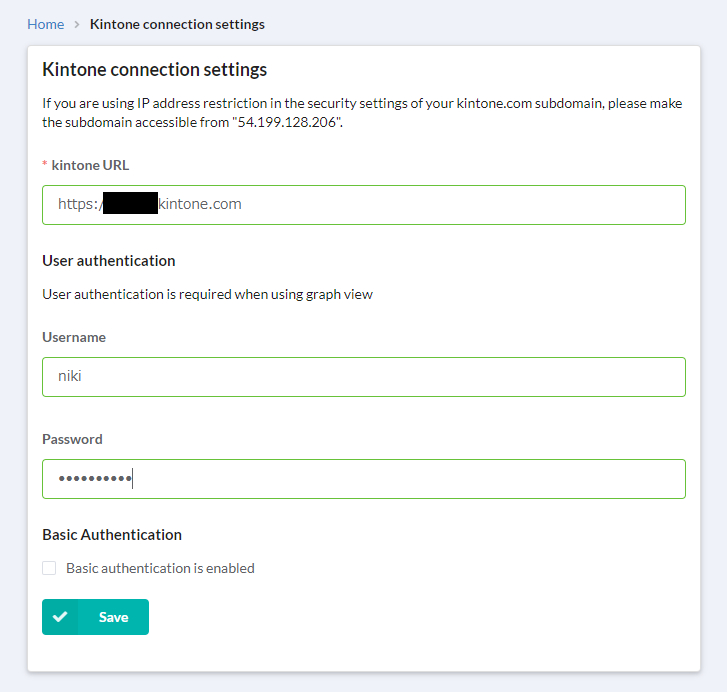 Fill in the
Kintone connection settings. Enter in the URL to the Kintone subdomain that you would like to use with kViewer.
If you are planning on making Graph Views, you will also need to enter in user authentication information.
Fill in the
Kintone connection settings. Enter in the URL to the Kintone subdomain that you would like to use with kViewer.
If you are planning on making Graph Views, you will also need to enter in user authentication information.You cannot use client certificates with kViewer. Please allow access to your subdomain from kViewer's IP address: 54.199.128.206
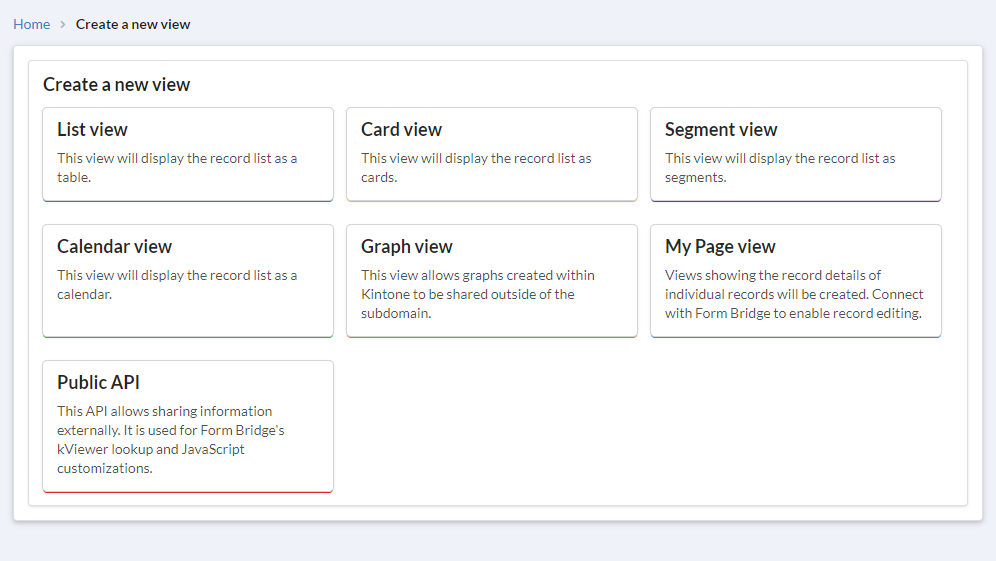 After setting
up the connection, you can create a view. Click the [+] button to create a new view. For this example, we'll
create a List View.
After setting
up the connection, you can create a view. Click the [+] button to create a new view. For this example, we'll
create a List View.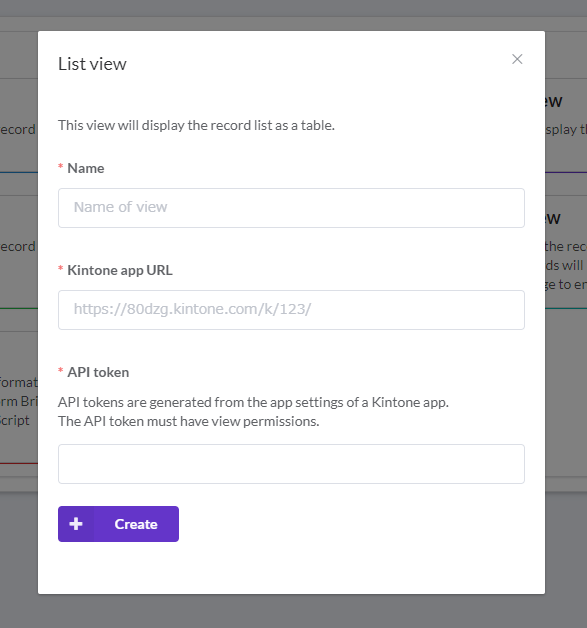 Enter in a
name for your view, the URL to the Kintone App, and the API token.
Enter in a
name for your view, the URL to the Kintone App, and the API token.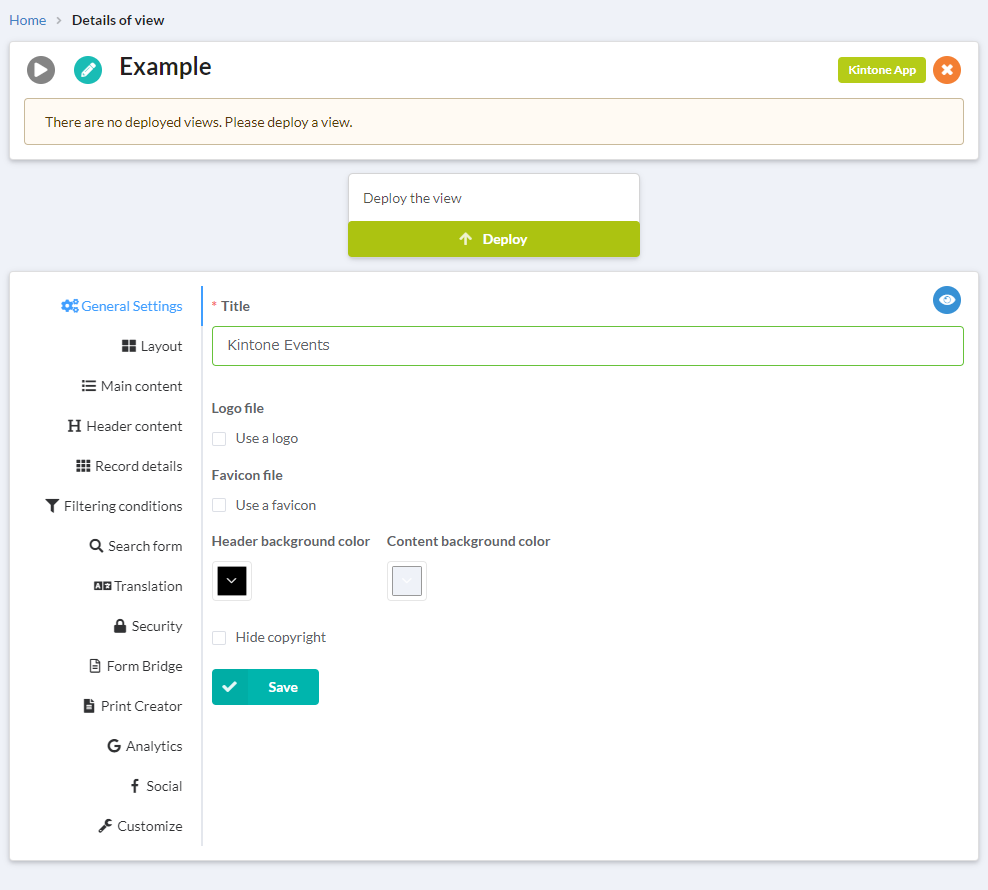 You can now
begin designing your view. Under General Settings, you can choose a title to be displayed on your view when it's
made public, a logo, a favicon, and the background colors of the header and content sections. You may choose to
hide the copyright with a paid version of kViewer.
You can now
begin designing your view. Under General Settings, you can choose a title to be displayed on your view when it's
made public, a logo, a favicon, and the background colors of the header and content sections. You may choose to
hide the copyright with a paid version of kViewer.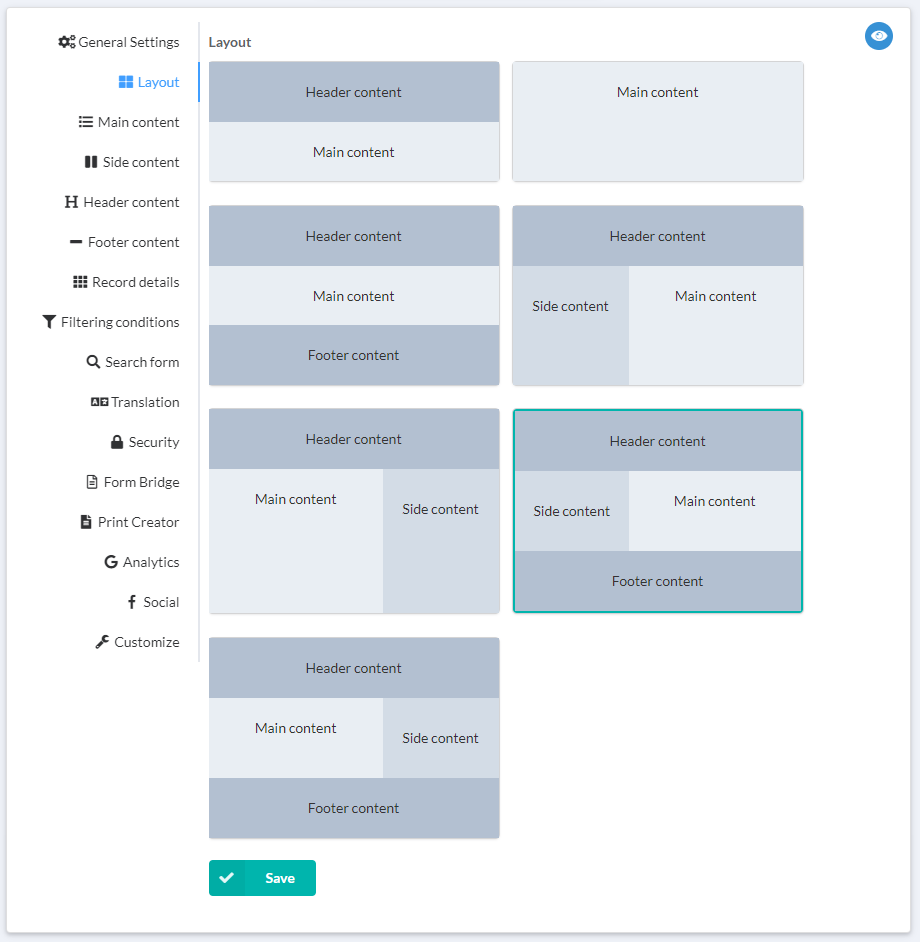 You can choose
a layout for your view from the Layout tab.
You can choose
a layout for your view from the Layout tab. Under the Main
Content tab, you can choose which fields you'd like to add to your view. The newest record in your Kintone App
will be used to show a preview.
Under the Main
Content tab, you can choose which fields you'd like to add to your view. The newest record in your Kintone App
will be used to show a preview.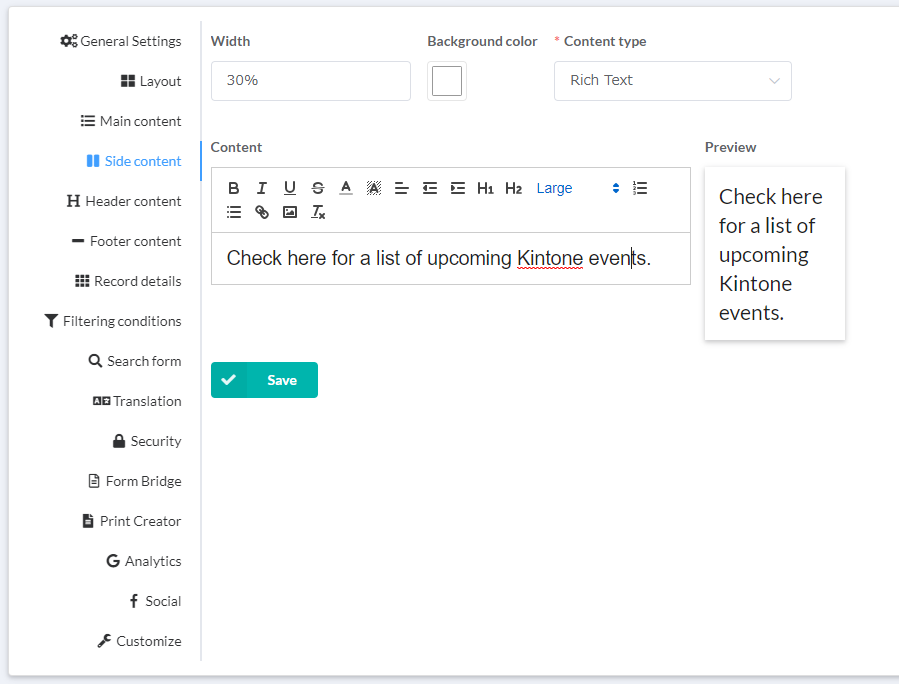 If you chose a
layout with side content, you can edit the side content from the Side Content tab.
If you chose a
layout with side content, you can edit the side content from the Side Content tab.If the layout that was chosen does not have any side content, this tab will not be displayed.
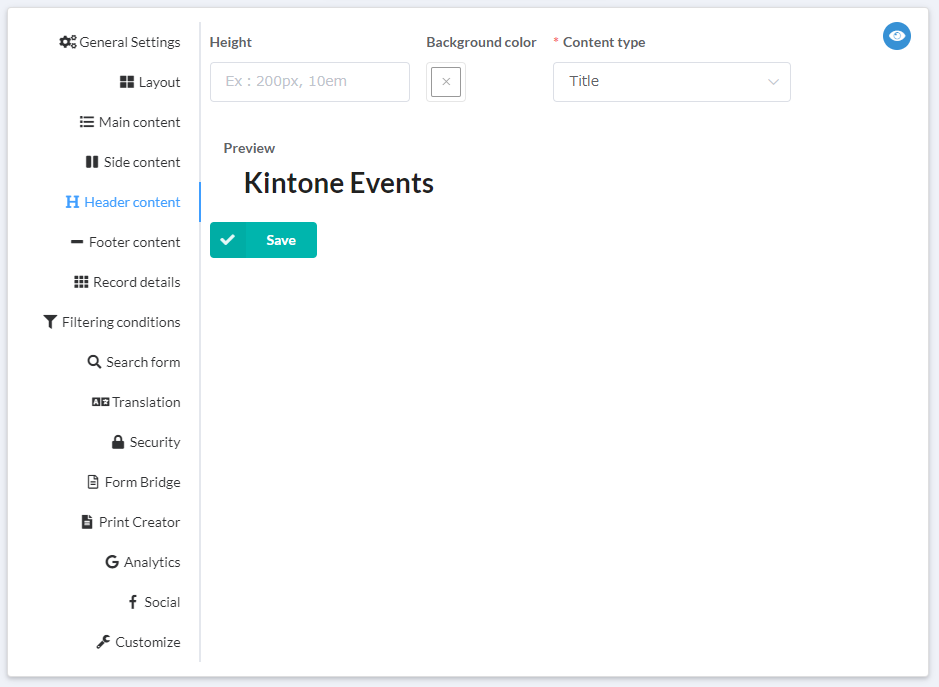 If you chose a
layout with header content, you can edit the header content from the Header Content tab.
If you chose a
layout with header content, you can edit the header content from the Header Content tab.If the layout that was chosen does not have any header content, this tab will not be displayed.
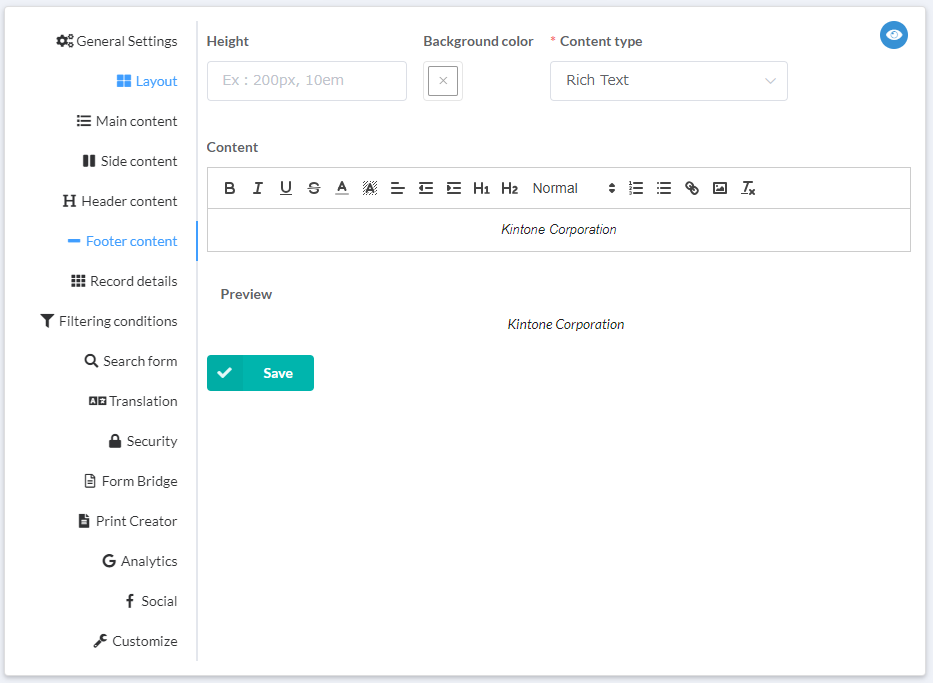 If you chose a
layout with footer content, you can edit the footer content from the Footer Content tab.
If you chose a
layout with footer content, you can edit the footer content from the Footer Content tab.If the layout that was chosen does not have any footer content, this tab will not be displayed.
 Next, you can
choose what to show in the record details from the Record Details tab. Choose the fields you'd like to make
public through your view. The most recent record in the Kintone App will be used as a preview.
Next, you can
choose what to show in the record details from the Record Details tab. Choose the fields you'd like to make
public through your view. The most recent record in the Kintone App will be used as a preview. From the
Filtering Conditions tab, you can choose to add a filter so only the records with the set conditions are shown.
From the
Filtering Conditions tab, you can choose to add a filter so only the records with the set conditions are shown.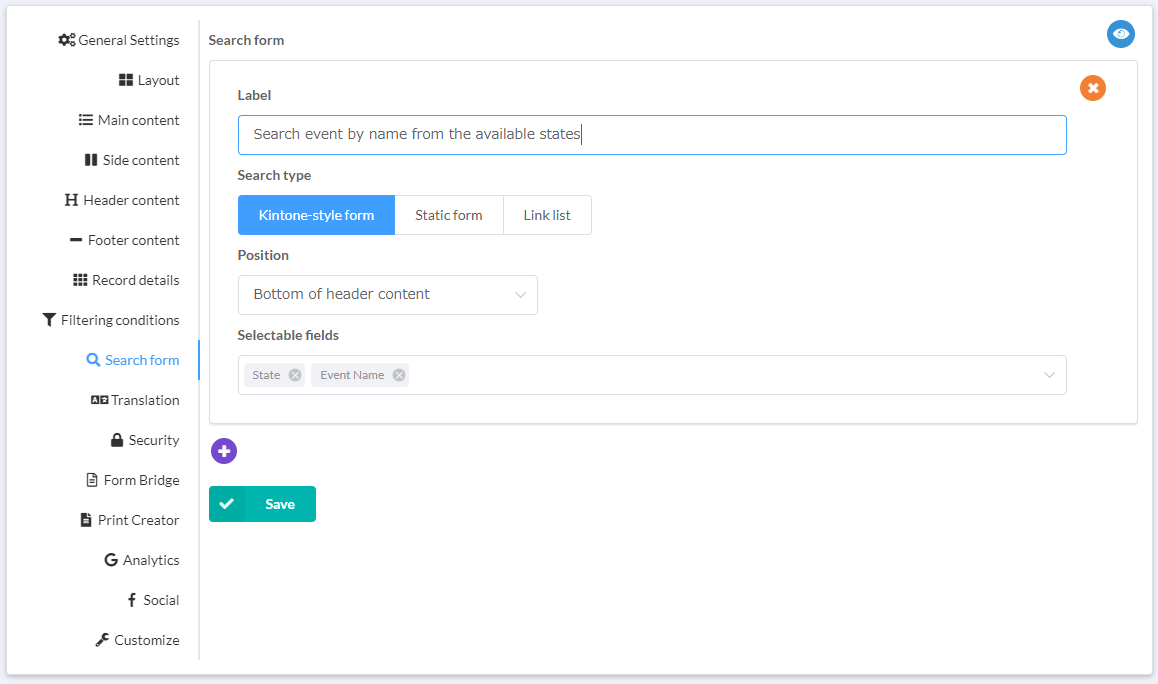 Under the
Search Form tab, you can create a form for searching through the available records, as well as a Link List for
quick links to popular searches.
Under the
Search Form tab, you can create a form for searching through the available records, as well as a Link List for
quick links to popular searches.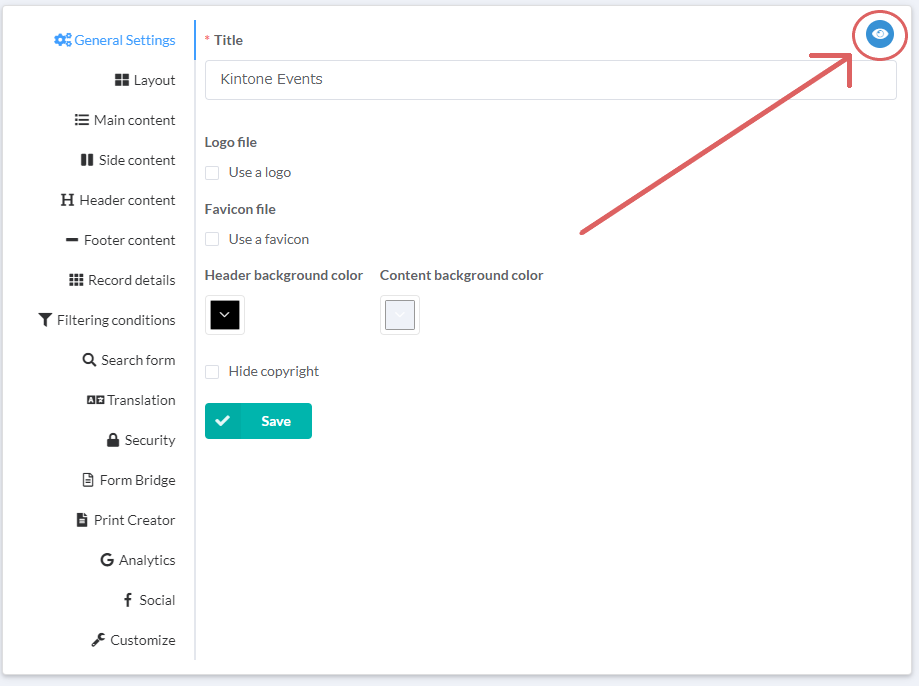 Basic setup of
the view is now complete. By clicking the Preview button in the top right of the screen, you can check to make
sure that the view is displaying the way you intend it to.
Basic setup of
the view is now complete. By clicking the Preview button in the top right of the screen, you can check to make
sure that the view is displaying the way you intend it to.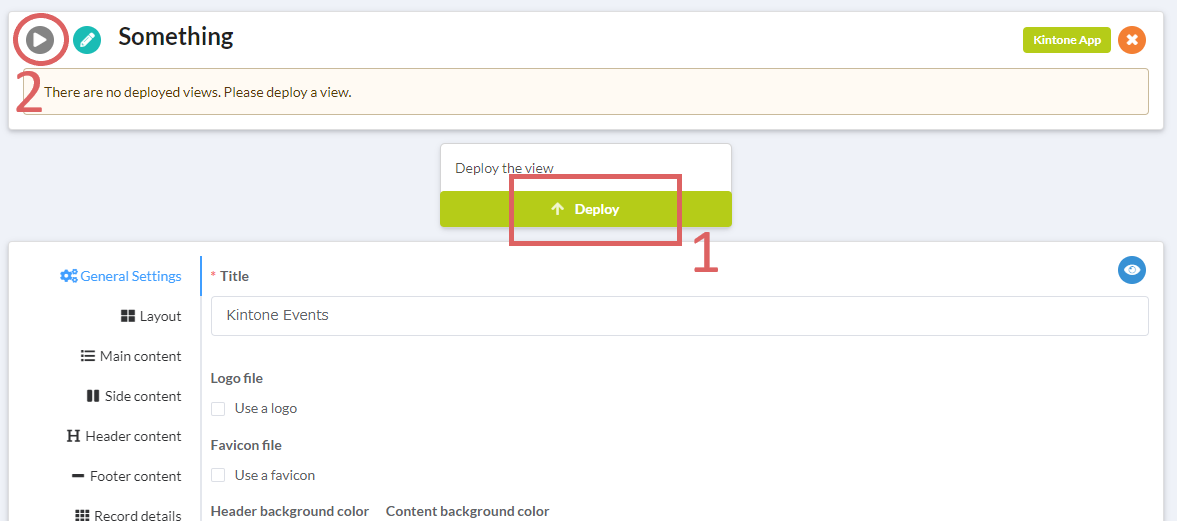 If everything
in the preview is okay, click the Deploy button to deploy the view, and then click the play button to make the
view public.
If everything
in the preview is okay, click the Deploy button to deploy the view, and then click the play button to make the
view public.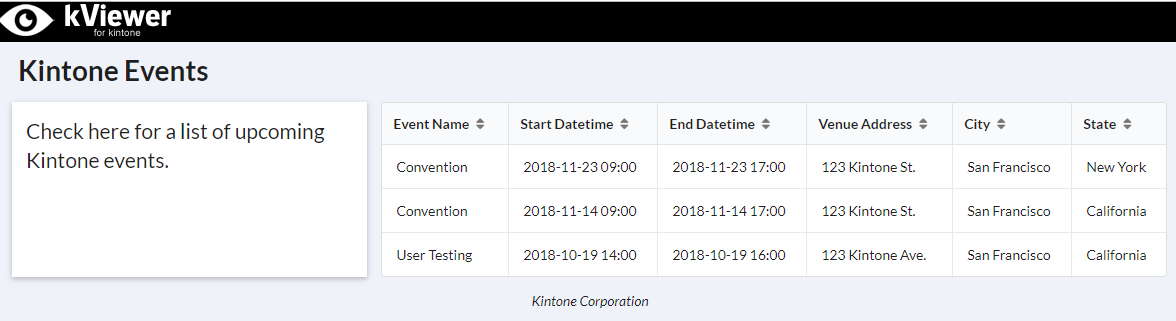 Finally, check
the final public view.
Finally, check
the final public view.